Spade offers graphics (brand logos and category iconography) for use in your application’s UI/UX. We recommend using the
display.graphic which provides our recommended graphic based on the parties involved in the transaction. Alternatively you can use the graphics returned in the counterParty.logo, thirdParties.logo and industry.iconfields.
Spade graphics conventions
You can generally expect logos and icons from Spade to follow these conventions:- Minimal padding - Graphics will not be surrounded with excess white/transparent space.
- Square-ish aspect ratio - We strive to provide graphics in a 1:1 square ratio, however because logos are often created by the brands themselves there may be exceptions
- Contrasts on a light background - Our graphics are intended to be viewable against a white or light colored background.
- Consistent resolution and image type - All graphics are PNG files with a minimum resolution of 500x500
Displaying logos in circles
Although Spade provides square-ish graphics, you may desire to display logos in circles. Below we’ve provided guidance on how best to render a square peg in a round hole.Naive scaling
Scaling by setting themax width or max height of the image to the diameter or the circle will work for logos that are perfectly square and have no content near the corners. However, when this approach is used with a graphic that is rectangular, parts of the graphic can be cut off (see the Comparison chart below).
Radius scaling (recommended)
Our recommended approach is to scale the graphic such that the corner of the graphic exactly meets the edge of the circle when centered. This approach provides the most reliable way to display the full graphic regardless of its ratio. To compute the scaling factor we find the ratio of the distance from the corner of the graphic to the center of the graphic, and the radius of the circle. Below is some pseudo code to calculate and resize our image:If you wish to allow for a small amount of padding around the graphic and the circle edge, multiply thescale_factorby0.95or similar.
Comparison chart
Below you can see the result of using the different scaling options on a variety of graphics, with radius scaling resulting in the full graphic being rendered inside of the circle.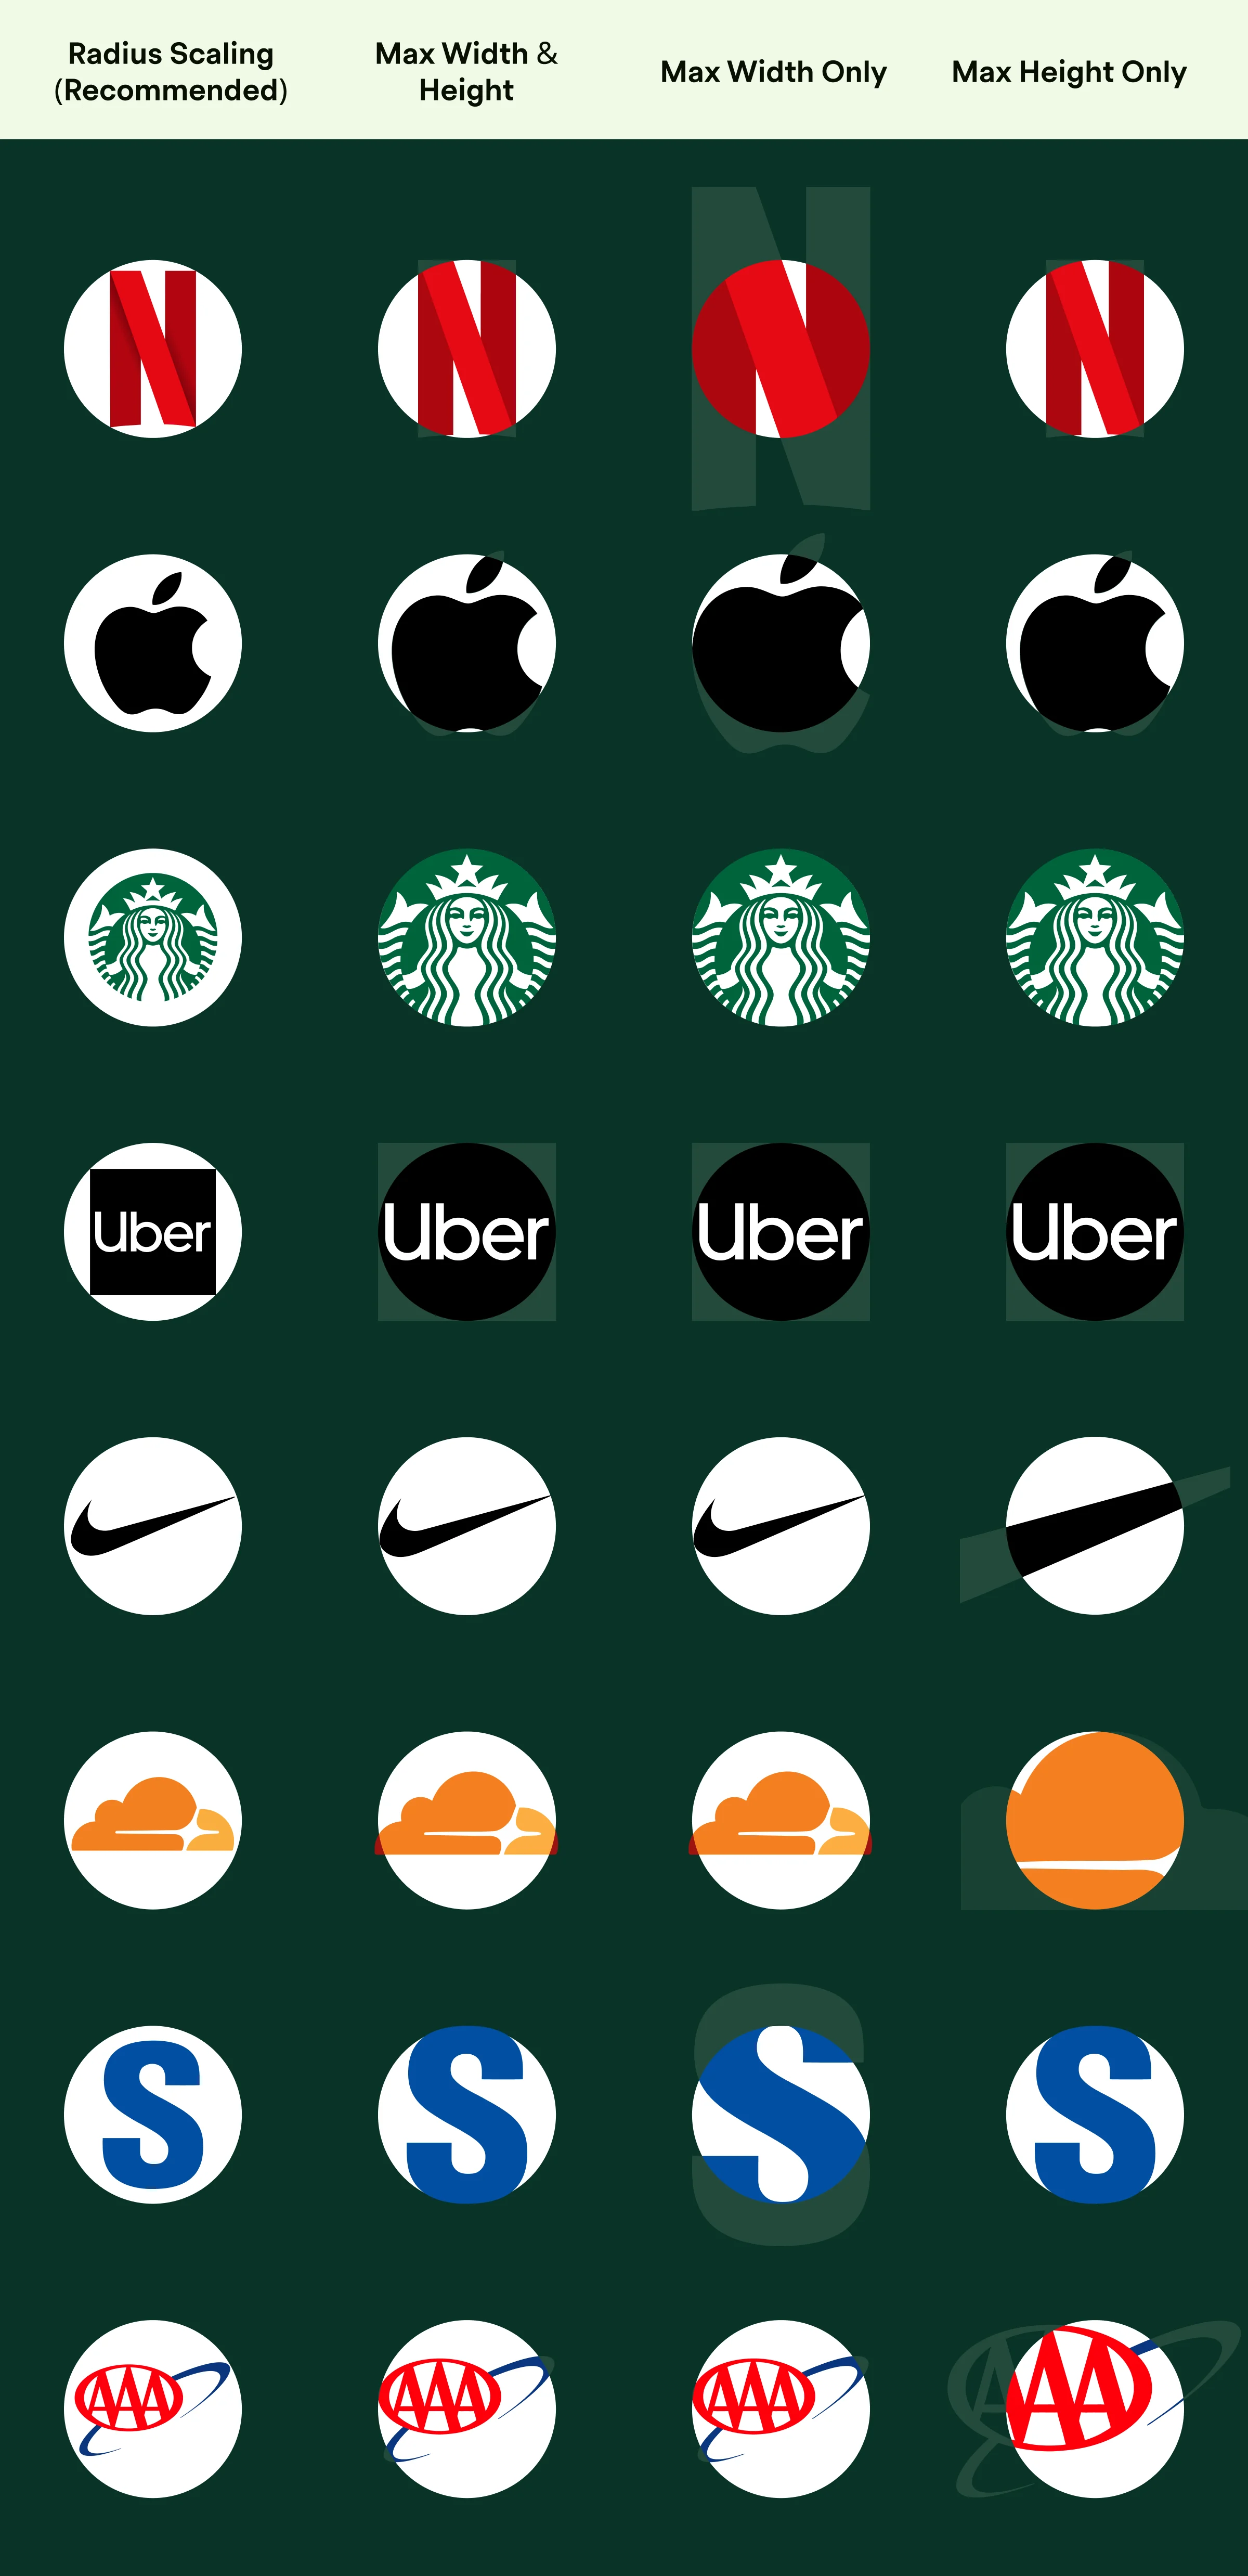
Advanced strategies
Beyond the options outlined above, there are some more advanced strategies available to those who are willing to do analysis of the image data itself. These approaches can offer better results at the expense of some computational costs.- Scale graphic to the pixel farthest from the center point By finding the hypotenuse to the outermost non-transparent pixel, instead of the corner of the image, you can find the largest size possible without overflowing the circle. For example, the Starbucks logo has only empty space in it’s corners and as a result the radius scaling leaves white space around the logo.
- Fill circle background with border color If the color around the perimeter of the logo is non-transparent and exactly constant, we can likely assume that using this color as a background for the circle will also be visually consistent. For example, the Uber logo above could be placed on a black background using this technique. There may be edge cases where sampling the interior graphic color may be more advantageous than using the color of the perimeter.